Almost ten years ago to the day, I published this blog post in which I said that I'd converted my Traddy from single-drive to double. I said that I would publish instructions. If I ever did so, I can't find them now.
I won't go into the whys and wherefores here, only the how. Suffice to say that I did this ten years ago and have been using this wheel for almost all spinning since, and I way prefer double-drive. As with all Ashford double-drive wheels, it can be switched to single-drive if desired. (you can see the brake band in my pictures.) This conversion is reversible (as long as you keep the single-drive flyer and bobbins) in case you want to return to single-drive-only.
First of all, this isn't perfect. My drive band doesn't quite line up with the drive wheel, but it's near enough.
If you have a single-drive Traditional in front of you, you'll see that the flyer whorl is closest to the orifice, and that the mother-of all (the oval plate) 'hangs over' the back.
In the picture above you'll see that a double-drive flyer has the flyer whorl at the back, alongside the bobbin whorl. In order to line these up with the drive wheel, we need the mother-of-all to 'hang over' the front of the wheel.
I've done this without a replacement mother-of-all, just made new holes in the existing one. I think there used to be a conversion kit, which included the mother-of-all and maiden uprights as well as the flyer. I can't see that on Ashford's site now, but maybe they still exist. This would be a better (if more expensive) conversion.
Disclaimer: I'm writing this with the best intentions and it worked for me. Obviously you modify your own wheel at your own risk. I accept no liability.
You will need:
- double-drive flyer with whorl and bobbins
- drive band
Ashford do sell the double-drive flyers and any Ashford retailer should be able to order one if they don't have one in stock. My preference (see the photo above) is for the older-style wooden flyer with cuphooks. For most spinning I use the high-speed whorl, along with high-speed bobbins. Ashford also sell the 'sliding hook flyer' which takes larger bobbins.
The important point here is that the whorl you use needs to be compatible with your bobbins. The bobbin whorl should be a little smaller than the smallest pulley on your whorl (see my high-speed setup above) otherwise your yarn won't 'pull'.
Ashford do sell drive band suitable for double-drive wheels. But this is no more than smooth cotton string. Any strong, non-stretch cotton string will do. Seine twine was once recommended to me and it does work very well. Important: don't try polycord drive band. That stuff is fantastic for single-drive but you need 'slip' with double-drive.
So the first part is to unscrew the hinges from the mother-of-all. They need to go roughly inline with where they were, but as far to the back as you can comfortably get them. See my picture above. You may want to drill tiny pilot holes for these, or maybe just push an awl into the wood - making a little pilot hole will help to avoid splitting the wood.
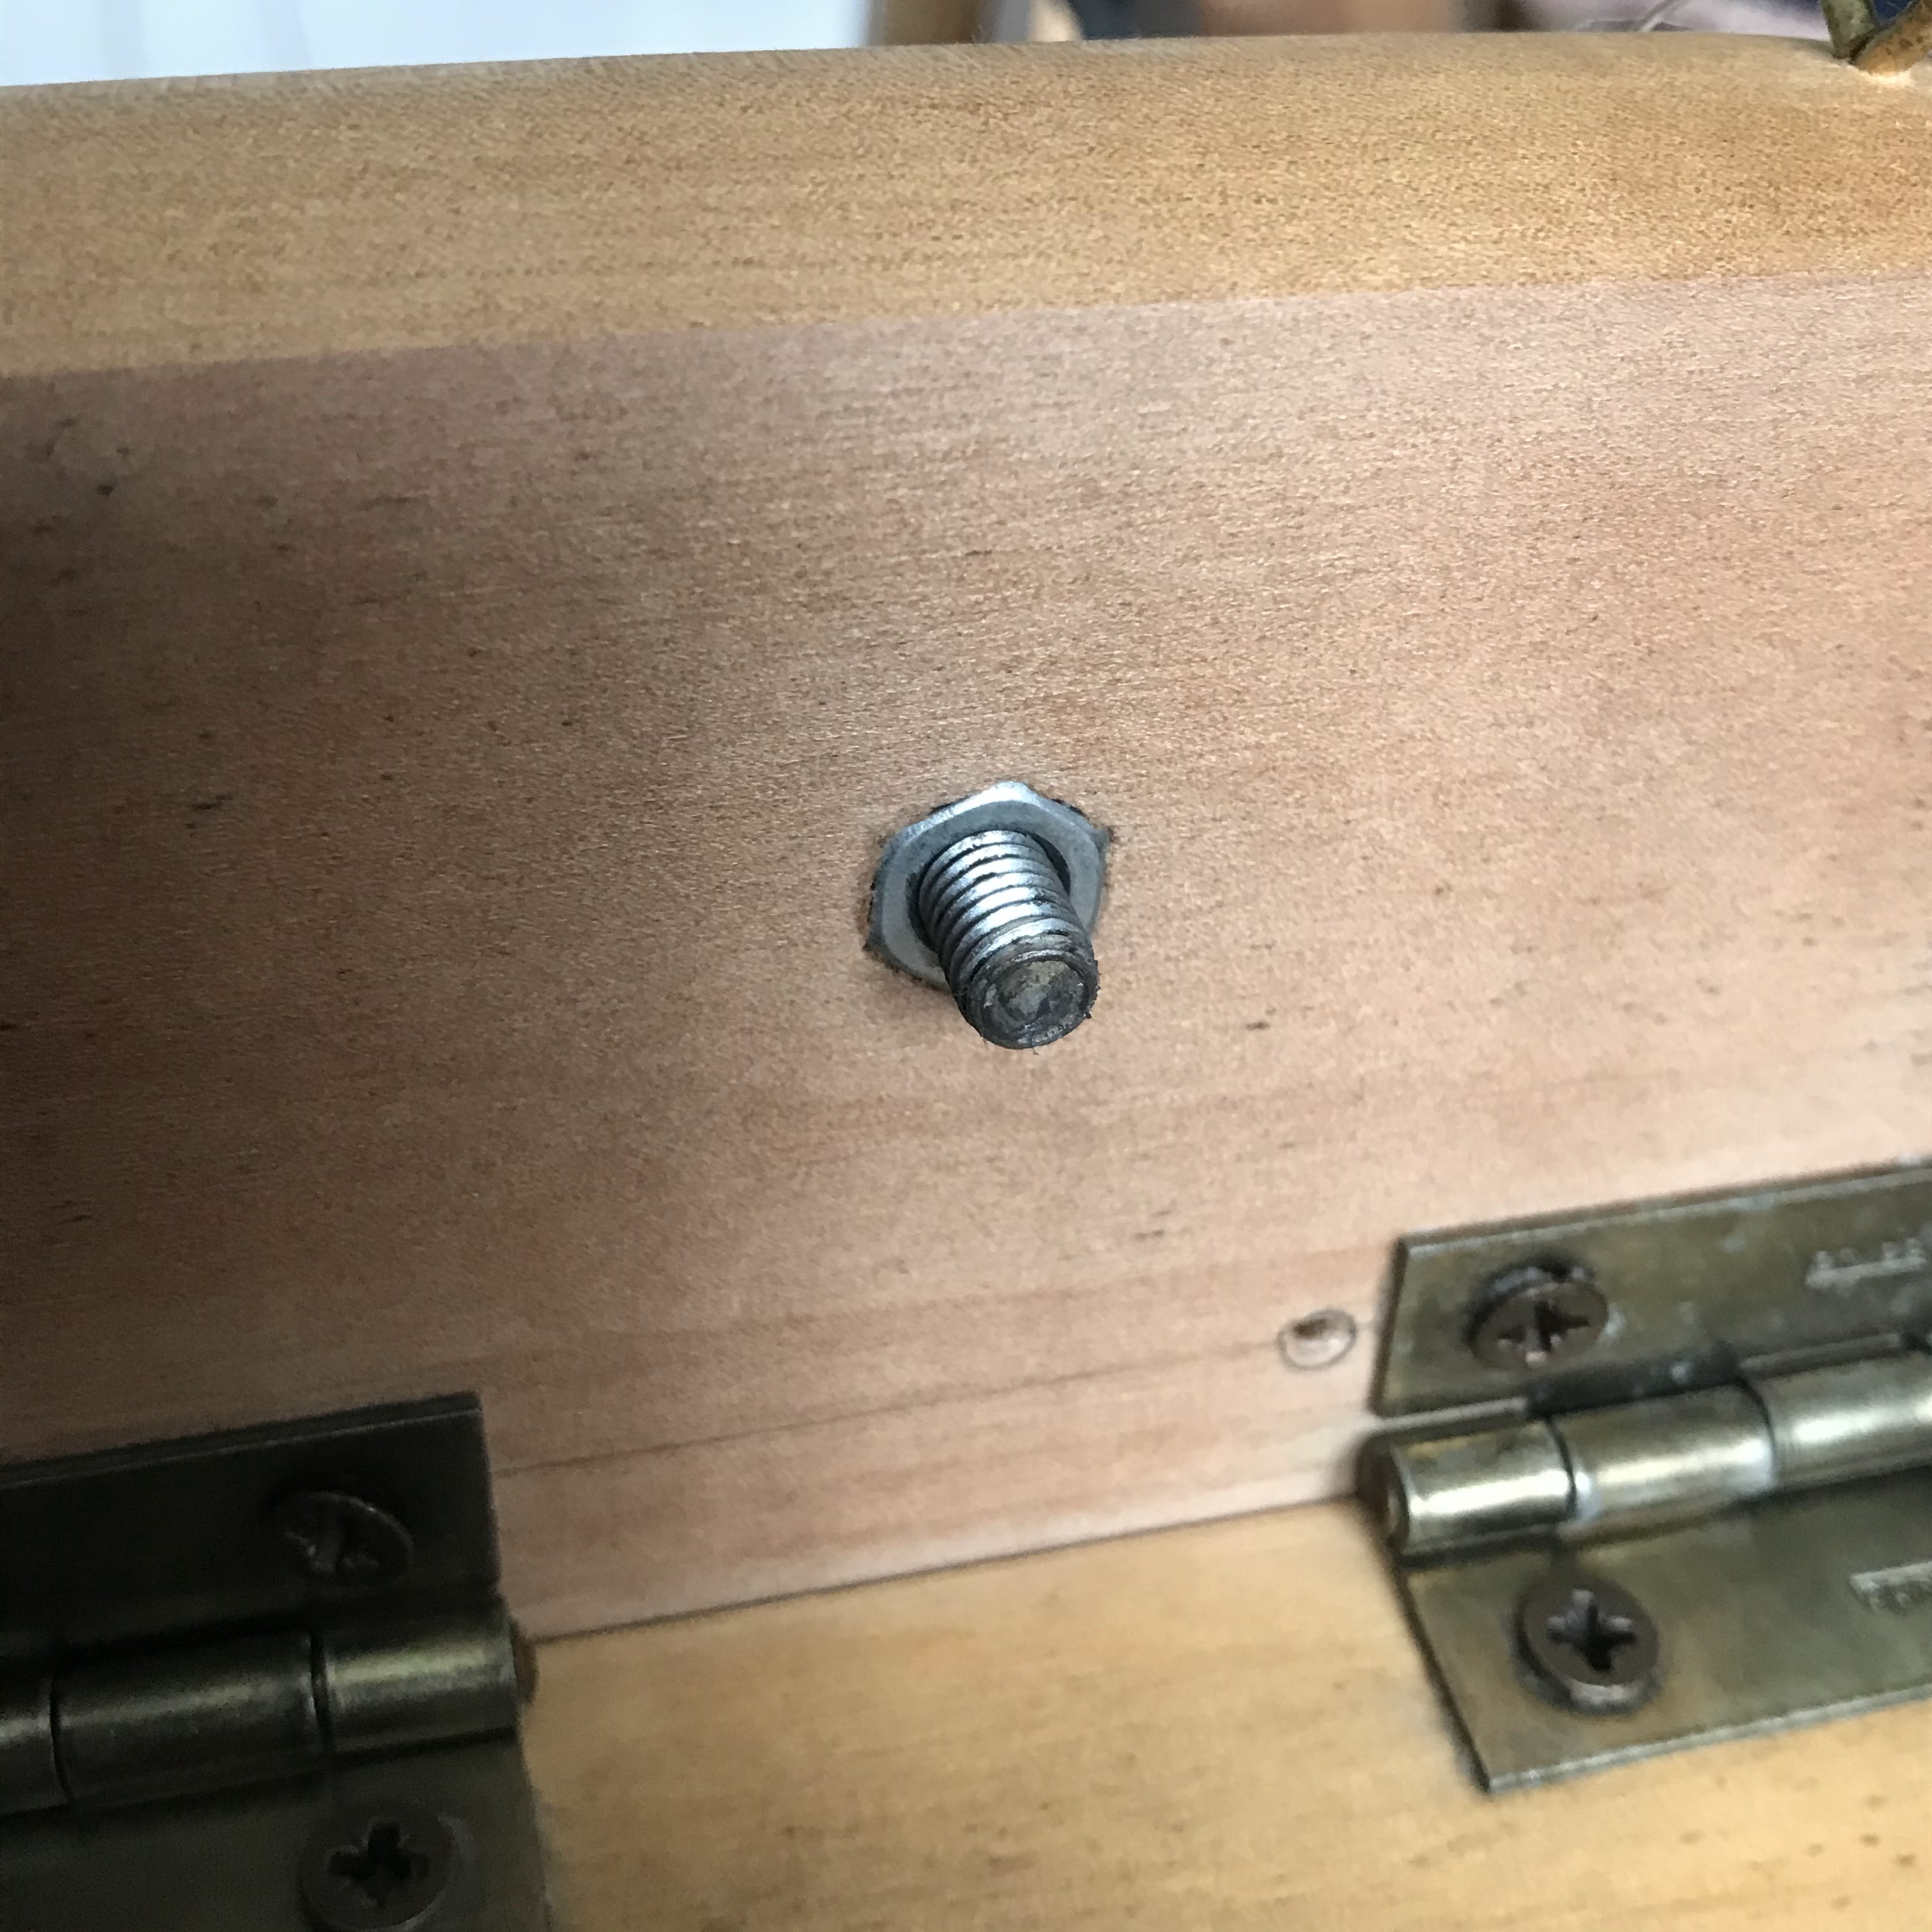
The tensioning knob needs to be moved too. After fitting the hinges to their new position, you should be able to see where that knob needs to go (so that it sits on the metal tack.)
Drill a hole big enough for the threaded part to slip through easily. Then recover the nut from the previous hole. (You may be able to lever it out with a screwdriver, or screw in a bolt with the same thread from above and carefully tap it with a hammer. If this fails, find a matching nut. It's M6 I do believe.) You'll need to drill a larger hole from the underside, just wide enough and deep enough for that nut. I think a 10mm bit will do it - the important thing is that you can hammer the nut in there and that it is then wedged tightly and doesn't spin.
Your drive band is one long piece of string which goes around the drive wheel twice. As you can see in my pictures, it goes once around the bobbin whorl and once around the flyer whorl. As with a single-drive, make sure the tensioning knob is fully unscrewed and get the band reasonably tight when on the largest flyer whorl.
That's it.
Finally here are a couple of pictures of my wheel with a double-drive sliding-hook flyer in place. The bobbins take way more yarn, the hooks are supposed to fill your bobbins evenly, but I tend to only use mine for plying.