Replacing the carding cloth on an Ashford drum carder


Seen here posing on its original box is an old Ashford carder following some restoration.

I bought this one unseen, and regretted it because the teeth were rusty rendering the carder unusable.

Replacement cloth is available but replacing it is very involved, time consuming and difficult. Not a job I want to do again. The cloth is available via your Ashford dealer (look no further) and the instructions for dismantling the carder are available for download from Ashford's site.

The original cloth is held on by industrial-strength staples. I stopped short of buying the staple gun after I spoke to a UK maker who uses strong double-sided tape to secure the cloth (plus the doffing strips of course).

As well as replacing the cloth and drive belt, the doffing strips came up like new using a spark-plug cleaning brass brush, and the wood looks good after a teak-oil and wax polish (this one doesn't seem to have been lacquered as per the current model).

I'll use it for a while and make sure that the cloth stays put.


Book review: Hand Spun by Lexi Boeger

New Spins on Traditional Techniques

Contents:
  1. Fiber Preparation: Dyed in the Wool
  2. Spinning Techniques: Learning vs Discovery
  3. New Twists: Expanding Traditional Techniques
  4. Permutations Gallery: Putting it all Together
  5. Projects: Keeping it Simple
  6. Appendix: Interview You!

Having Alison Daykin as a teacher might have steered me in the direction of art yarn, but I find that the yarns I like making most are thin, smooth and even.

Despite this I find Lexi Boeger's work outstanding. A while ago I featured a selection of her photographs in my newsletter.

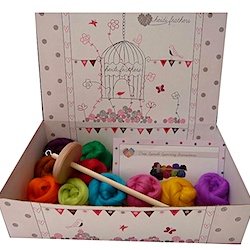
The first section of the book covers preparation and carding of your raw fibre and contents of your 'treasure box'.

The techniques follow. I was expecting the usual: thick/thin, slubby, core and coil, but this is a big book and the techniques go on and on with techniques and many variations that you may not have seen before.

I think of art yarn as yarn which looks beautiful as yarn. The term 'art yarn' is used in the book, but far from wanting you to make yarn that you only admire in it's own right, Lexi intends that you use what you make. she proposes keeping the stitching very simple, allowing the yarn to speak for itself. The twenty projects - yes twenty - include a fly-fishing dry-fly. That may be a first!

I have to be honest and say that while I find almost all of the pictures of the yarn really appealing, only a few of the projects grab me. However, it goes beyond knit & crochet and they serve to demonstrate some imaginative ways to use your yarn.

In addition to all of this, the book has an enjoyable introduction from Owen Poad of Majacraft, a gallery, some profiles / interviews with artists and Lexi's tips.

The jacket says that this is a 'well rounded' book and it certainly is. Nicely-designed, well-illustrated with sufficient and accessible text. it covers the subject very well, from preparation through to finished projects.

I was doubtful about whether to order this book but when it arrived, I was immediately drawn in and although I didn't have the time to sit down and read it properly straight away, I couldn't walk past it without picking it up and flicking through it.

Check out pluckyfluff online http://www.pluckyfluff.com/yarn.html to see what Lexi does and if you like those images, then you'll love this book.

160 pages, paperback, £16.99

crochet chocs for valentine's?

There have been loads of Valentine's day patterns around, many heart-shaped and almost all pink or red, but this is by far my favourite.


Rather than make the box and all the chocs, I've only had time to make a few and find a nice sweetie box.

I'm thinking a nice table-decoration for our forthcoming holiday which is to celebrate two birthdays and an anniversary!

Learning to crochet


At Christmas Mum showed me how to hold a crochet hook. I've resisted crochet for a long time, but a long time ago I pinned this pattern: Tatiana Pullover from Interweave - it's lovely and inspired me to learn to use a hook.

It didn't go too well at first, but I've persevered and after lots of head-scratching over the pattern and gazing at Youtube videos it's taking shape!

The yarn I've chosen is Tekapo in dark red, beautiful dk 100%wool.

Brainless knit will keep the brains very warm

I'm not doing very well with my resolution to be finishing more projects than I'm starting, but as I've started and finished this one, does it cancel itself out?

I was feeling down at the weekend and needed a quick and brainless knit. This is the Easy-Fit Ribbed Hat. I had a skein of Artesano 50% alpaca / wool aran weight- 100g just about made the hat

It wasn't as quick to knit as I had hoped, using big needles like these (6.5mm) is quite clumsy. But by the end I was getting quite deft with the 'right needle anchored under the arm' technique, which worked really well with these big needles.

For speed with 2x2 rib, I knit all the k stitches through the back loop, which gives them that odd twist, but I quite like it.

Yarn bowls in progress


Much-requested before Christmas and demand exceeding supply, I visited Helen during the holidays and saw lots in progress. I was able to take a limited number of finished ones which are now available at p2tog

She's had problems getting the bowls dry in the cold weather, if they're not dry they explode in the kiln. There are lots more in progress, both the original design (pictured) and the new deco design

Baby bootees

As if they're not cute enough, they're all the more special because the pattern is a vintage pattern and I've used some of my grandmother's needles.


The great thing about baby knitting is the speed that you can finish things. I finished knitting these on Christmas day, just a couple of days after starting them but because I hate seaming up, they've been sat in my bag waiting.

The pattern is Twinkle Twinkle Little Star bootees. I love the pattern, it kept me interested (right up to the seaming part...)

I actually knit three bootees altogether because I wasn't happy with the first one. If you're thinking of making these, my tip is that for the sole increases where it says 'm1' read 'kfb' and on the instep (top of foot - the lace pattern) where it says 'm1' read 'yo'.